
SFM Compile: The Ultimate Beginner’s Guide to Compiling Models in 2026
You drop a new character into Source Filmmaker and see a pink-and-black checkerboard. Or the model never shows up at all. Every artist hits this wall. The fix is SFM compil, the step that turns raw 3D files into a model the Source engine can read. This Source Filmmaker compile guide is a beginner SFM tutorial with simple words and clear steps. By the end, you’ll know how to compile models for Source Filmmaker and fix the most common problems.
What Is SFM Compil and Why Does It Matter?
SFM compile is the process of converting your 3D files into the format that Source Filmmaker understands. Think of it like translating a book. The story stays the same, but every word changes so a new reader can follow it. Blender and Maya save files in their own formats. Source can’t read those formats directly. The Source engine model compiler rebuilds your mesh, bones, and materials into a set of game-ready files.
Without this step, SFM custom models can’t exist inside your scenes. Props, characters, and outfits all need SFM model compilation first. This SFM compile tutorial treats the job as a pipeline. You build the assets, write a short script, run the compiler, and then test the result. Once you finish one model, the whole SFM compilation process feels much less scary.
How Model Compilation Works in Source Filmmaker
The compiler reads one text script called the QC file. That script lists your meshes, model skeleton, materials, and model animations. The StudioMDL compiler opens each file and checks the data. Then it builds the final model files for the Source engine. A good way to picture it is a recipe. The QC file is the recipe card, and the compiler is the cook. If one ingredient is missing, the dish fails, and the compiler log tells you which one.
Source Files vs. Compiled Model Files
Source files are the pieces you make. Compiled files are the pieces the game loads. The MDL model file is the main one, and it works with several helper files. Keeping these two groups apart helps you stay organized. You edit the source files and never touch the compiled ones by hand. The table below shows the difference.
| Type | File | What It Does |
| Source | SMD file format or DMX file format | Holds the mesh, bones, and animations |
| Source | QC file | Tells the compiler what to build |
| Source | PNG or TGA image | Your raw texture art |
| Compiled | MDL | The main model file |
| Compiled | VVD | Stores vertex data |
| Compiled | VTX | Stores optimized triangle data |
| Compiled | PHY | Stores the collision model as a physics file |
| Game-ready | VTF texture file and VMT material file | The texture and its material settings |
SFM Compilation vs. Exporting vs. Rendering
Many beginners mix up three different jobs. SFM model export happens in Blender. You save your mesh as an SMD or DMX file. Compiling happens next, and it builds the real model. Rendering is the last job. It turns your finished scene into a movie or image. Some guides call movie export “compiling,” which causes real confusion. In this guide, SFM compile always means building a model. Keeping the three terms apart will save you hours of searching for the wrong fix.
Essential Files and Tools for SFM Compile
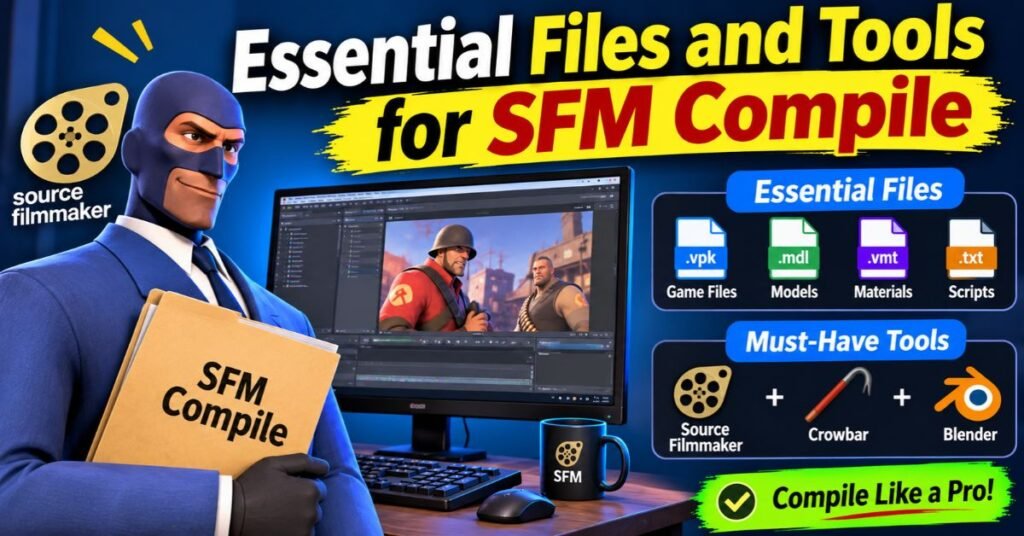
You don’t need an expensive setup. A few free SFM compiler tools cover almost every job. You need a 3D editor, an exporter, a compiler, and a texture tool. Each one has a clear role in SFM model creation. Most beginners start with Blender, Crowbar, and VTFEdit. That small kit is enough for props, characters, and weapons.
The tools connect in a simple chain. Blender creates the mesh and bone rigging. The exporter saves SMD or DMX files. The compiler reads your QC script and builds the model. Finally, Source Filmmaker loads the result. When one link breaks, the whole chain stops. Knowing the chain makes SFM model setup far easier to debug.
SMD vs. DMX: Which Format Should You Use?
Both formats carry your mesh and skeleton. The SMD file format is old and simple. It stores plain text and works with nearly every tool. The DMX file format is newer and holds more data in one file. It can store facial flexes inside the same file. For understanding Source engine model formats, remember this rule. Pick SMD for simple props and quick tests. Pick DMX when you need flex data or want fewer files.
| Feature | SMD | DMX |
| File style | Plain text | Binary or text |
| Flex data | Needs a separate VTA file | Stored in the same file |
| Best for | Props and simple models | Faces and complex characters |
| Beginner friendly | Very | Moderate |
Understanding the QC File and Important Commands
Creating QC files for Source models is easier than it looks. Each line is one short command. The command $modelname sets the output path. The command $bodygroup or $body adds your mesh. The command $cdmaterials points to your model directory for textures. The command $sequence adds an animation. The command $surfaceprop sets the material sound and feel. The command $collisionmodel adds physics. You can read the Valve wiki page on the QC format for the full list. Here is a small sample.
$modelname “custom/crate.mdl”
$staticprop
$body “crate” “crate_ref.smd”
$cdmaterials “models/custom/crate/”
$surfaceprop “wood”
$sequence “idle” “crate_ref.smd” fps 1
StudioMDL: The Source Model Compiler
Valve built StudioMDL as its command-line Source engine model compiler. It ships inside the SFM folders. You’ll usually find studiomdl.exe in the game\bin folder of your Source Filmmaker install. To learn how to use the StudioMDL compiler, you give it a path to your QC file. It then prints a long log and builds the files. It’s fast and precise. However, it has no buttons or hints. Most beginners run it through Crowbar first and use it directly later.
Crowbar: A Beginner-Friendly Compilation Tool
The Crowbar tool wraps StudioMDL in a clean window. You pick a game setup, choose your QC file, and press Compile. It also shows the log in plain view. You can find it on GitHub or through community pages. Crowbar can also decompile existing models, which helps you study working QC files. For resolving Crowbar configuration errors, always check the game setup first. A wrong setup is the top cause of early failures.
Blender and Other 3D Modeling Tools
Blender 3D software is free and very popular for SFM model creation. The Blender Source Tools add-on exports SMD and DMX files. Other tools like Maya or 3ds Max can export too. For exporting Blender models to SMD or DMX, check your model export settings. Set the scale correctly and pick the right up-axis. Choose the right armature too. Also confirm that your add-on version matches your Blender version. A mismatch causes strange export failures.
See Also : SFM.Compile: Easy & Powerful Guide to Compiling Models in 2026
Required Model, Material, and Texture Files
Every textured model needs two material files. The VTF texture file holds the image. The VMT material file tells the engine how to draw it. This pair handles texture mapping in the Source engine. For setting up VMT and VTF materials, convert your PNG or TGA with VTFEdit. Then write a VMT that points to the VTF path. Keep these files in the materials folder, and keep names short and lowercase. The checklist below sums it up.
| Item | Where It Goes | Quick Check |
| Reference mesh | Your project source folder | Matches the QC name |
| VTF image | materials/models/yourname/ | Dimensions are powers of two |
| VMT file | Same folder as the VTF | $basetexture path is correct |
| Compiled model | models/yourname/ | Folder matches $modelname |
How to Compile an SFM Model Step by Step
This is the heart of the step-by-step SFM compile process. It has eleven short steps. Each step feeds the next one. Skipping ahead is the fastest way to waste an afternoon. Move in order, and check your work after each stage. That habit turns a long list into a smooth routine.
Before you start, set up a pre-flight check. Save a backup of your Blender file. Make one clean project folder. Then pick a simple prop for your first run. A box or a chair works well. This approach is the easiest way into compiling static props for SFM. After one win, you can move to characters with confidence.
Step 1: Prepare and Optimize Your 3D Model
Start with a clean mesh. Apply the scale, rotation, and location in Blender. Unapplied transforms cause stretched models after compiling. Remove hidden faces and loose points. Then merge doubled vertices. For optimizing 3D models for SFM, keep the polygon count sensible. There’s no official magic number, but under about 60,000 triangles for a character is a common community habit. Lower counts keep SFM smooth during playback and rendering.
Step 2: Check the Skeleton, Bones, and Rigging
Next, inspect the model skeleton. Every bone needs a clear name and a proper parent. Every vertex needs a weight. Source usually allows up to three bone links per vertex. It also limits the total bone count, with 128 as the common ceiling. Good bone rigging prevents most deformation problems later. If you plan to reuse existing SFM animation models, match Source bone names. Matching names let old animations drive your new character.
Step 3: Export the Model as SMD or DMX
Now export the reference mesh. Use the Source Tools add-on and choose SMD or DMX. Check your model export settings before pressing Export. Confirm the scale and the format version. Select only the objects you need. Then name the file clearly, such as crate_ref.smd. Keep that name consistent with your future QC file. A tidy name here prevents “file not found” errors later.
Step 4: Export Animations and Facial Flex Data
Every model needs at least one animation. Even a prop needs an idle sequence. Export it as its own SMD or DMX file. For compiling animated models for Source Filmmaker, export each action as a separate file. Name them clearly, such as walk or idle. For adding facial expressions to custom characters, export your shape keys as facial flexes. DMX stores them in one file. SMD needs a separate VTA file.
Step 5: Convert Textures and Create VMT Materials
Open your PNG or TGA image in VTFEdit. Save it as a VTF texture file. Use sizes like 512 or 1024 pixels for easy handling. Then write a simple VMT. The $basetexture line points to the VTF path without the file extension. Many people use VertexLitGeneric as the shader for models. This is the core of setting up VMT and VTF materials. Wrong paths here lead straight to the checkerboard.
Step 6: Write and Configure the QC File
Open Notepad++ and start a new file. Add the model name, the body mesh, and the material path. Then add a surface property and one sequence. Keep the first draft short. You can add extras later. This step is the center of creating QC files for Source models. A short, clean script is easier to debug than a giant one. Save it with the .qc extension beside your source files.
Step 7: Set Up the Correct Compiler and File Paths
Open Crowbar and go to the Set Up Games tab. Choose Source Filmmaker as the game. Point the game setup to the gameinfo.txt file inside the SFM game\usermod folder. Then point the compiler to the studiomdl.exe file in the game\bin folder. This step solves most resolving Crowbar configuration errors cases. Double-check the spelling of every folder. One wrong letter in a path can block the whole compile.
Step 8: Compile the Model Using StudioMDL or Crowbar
In Crowbar, open the Compile tab. Choose your QC file and set the output to your SFM game folder. Then press Compile. If you prefer the command line, run studiomdl.exe with the -game option and your QC path. Both ways use the same StudioMDL compiler engine. Crowbar is friendlier for a first try. The command line gives more control later. Pick one method and stay with it while you learn.
Step 9: Read the Compiler Log and Fix Errors
The compiler log is your best teacher. Scroll to find lines that start with “ERROR” or “WARNING.” Errors stop the build. Warnings show risks that may still hurt your model. Read the first error first, since later ones often follow from it. This habit is the core of troubleshooting SFM compilation errors. Fix one issue and recompile. Don’t change ten things at once, or you won’t know which change helped.
Step 10: Install the Compiled Files in Source Filmmaker
Now place your files in the right spot. This is SFM model installation. The model files usually live in game\usermod\models, and materials live in game\usermod\materials. The folder path must match the paths in your QC. For installing compiled models in SFM, copy the MDL, VVD, VTX, and PHY files together. Then restart Source Filmmaker so it refreshes its model list. Your new asset should now appear in the model browser.
Step 11: Test the Model in HLMV and SFM
Always test in the HLMV model viewer first. It loads fast and shows problems clearly. Testing compiled models with HLMV lets you spin the model and check textures. You can also see bones and play the idle sequence. After that, load the model into a blank SFM session. Pose it and light it, and move the camera around. If everything looks right, your model is ready for real scenes.
Common SFM Compile Errors and How to Fix Them
Errors are normal. Even veterans see them daily. The good news is that most SFM compile errors are easy to read. The compiler log often names the exact file or line. Learn to scan it quickly. That skill alone will make you a faster creator.
Use a three-question method when something breaks. First, are the paths correct? Second, are the materials in the right place? Third, are the bones and weights clean? Most model compilation errors fall into one of these three groups. The table below gives a quick overview before the detailed fixes.
| Symptom | Likely Cause | Quick Fix |
| Checkerboard texture | Wrong $cdmaterials or VMT path | Match folders and names |
| Model missing in SFM | Wrong output folder | Move files to usermod\models |
| Gray model | Missing material | Add the VMT file |
| T-pose only | No sequence lines | Add $sequence |
| Stretched mesh | Unapplied transforms | Apply and re-export |
| Compiler crash | Bad mesh or path | Simplify and rename |
StudioMDL Cannot Find the QC or SMD File
This error means the compiler can’t open a file you named. Check for typos first. Then check the folder. StudioMDL reads paths relative to the QC file’s location. If your SMD sits in another folder, add that folder to the path. Avoid spaces and special characters in names. Move your project to a short path like C:\sfm_projects and try again. Most “file not found” problems vanish after that.
Purple and Black Checkerboard or Missing Textures
This is the most famous bug. Fixing purple and black checkerboard textures starts with $cdmaterials. The path in your QC must match the folder under materials. Next, check the VMT name. It must match the material name in your SMD file. Then confirm the $basetexture path inside the VMT. Last, make sure the VTF file really sits in that folder. One mismatch anywhere gives you the pattern.
Compiled Model Does Not Appear in SFM
Sometimes the compiler succeeds but nothing shows up. The files probably sit in the wrong place. Check that they live in the game\usermod\models with the same subfolder as $modelname. Then restart SFM, because it builds its model list at launch. Also check that you copied all four files. A missing VVD or VTX can stop the model from loading. When in doubt, test it in HLMV first.
Model Appears Gray or Some Parts Are Missing
A gray model usually lacks a valid material. The engine falls back to a plain look. Check that every material name in your mesh has a matching VMT file. Missing parts often come from flipped normals. They can also come from faces without materials. In Blender, recalculate normals and check for hidden faces. Export again and recompile. Also confirm that every part is listed in your $body or $bodygroup lines.
Missing Bones, Broken Rigging, or Incorrect Deformation
For fixing missing bones in SFM models, begin with the weights. Unweighted vertices stay behind when bones move. Select all vertices in Blender and check that each one has a group. Make sure no vertex uses more than three bones. Then confirm the total bone count stays under the limit. Finally, check that your armature was included in the export. A good weight-paint pass solves most stretching and tearing.
Model Loads in a T-Pose or Animations Do Not Work
A T-pose means the model has no active animation. Your QC probably lacks a $sequence line. Add an idle sequence at minimum. If the sequence exists but nothing moves, the skeleton may not match. Bone names in the animation file must match the reference file exactly. One different letter breaks the link. Re-export both files from the same armature to keep them in sync.
Incorrect Model Scale or Orientation
Correcting model scale and orientation is usually a Blender fix. First, apply all transforms. Then check the unit scale in your scene. Source models often face along the positive X axis, so check your export axis settings. If the model is tiny or huge, you can also adjust the $scale command in the QC file. Still, fixing the source file is cleaner. Test the result next to a default SFM character.
See Also : SFM Compile Made Easy: The Complete Guide to Source Filmmaker (2026)
Compiler Crashes or Stops Mid-Process
A crash often points to a damaged export. Try exporting again with fewer objects. Very dense meshes can also overwhelm the compiler. Strange characters in folder names cause trouble too. Move the project to a plain path and retry. Read the last lines of the log before the crash. They often name the file that failed. If one animation causes it, remove that line and compile without it.
Crowbar Reports an Invalid Game Setup
This message means Crowbar can’t find the game files. Open Set Up Games and re-select the SFM gameinfo.txt. Check that the compiler path points to the right studiomdl.exe inside the SFM folders. Make sure SFM is fully installed through Steam. After fixing the paths, press Compile again. This is the most common Crowbar configuration error, and it takes less than a minute to fix.
Collision and Physics Problems
Physics errors show up as models that fall through the floor or won’t hold a shape. Check that your QC includes $collisionmodel. The collision mesh should be simple and convex. Complex shapes need to be split into convex parts or use the $concave option with care. Keep the collision mesh far lower in detail than the visual mesh. A missing or broken physics file will not stop the model from loading, but it can break physics features.
Advanced SFM Compile Techniques
Once the basics feel easy, you can grow your skills. These techniques suit artists who want richer characters and cleaner performance. They matter most for creators who share custom models for Source Filmmakers with others. You don’t need them on day one. Still, they separate a quick prop from a professional asset.
Each technique builds on the same workflow. You still export, write a QC, compile, and test. The only change is that you add more commands and more checks. Think of it as adding extra layers to a cake you already know how to bake. Go one layer at a time and test often.
Compiling Static Props and Custom Characters
A prop needs a mesh, a material, an idle sequence, and $staticprop if it never moves. This makes compiling static props for SFM quick and light. Characters need more. They need a full skeleton, weights, flexes, and many sequences. Compiling custom SFM characters takes longer for that reason. Many artists make a prop first to test their folders and tools. Then they reuse the same setup for characters.
Adding Animations, Facial Flexes, and Expressions
Facial work brings a character to life. In DMX, the flex shapes travel with the mesh. In the QC file, you then add flex controller lines that group those shapes into sliders. This is how adding facial expressions to custom characters works in practice. Start with a few basic shapes like blink and smile. Test each slider in SFM’s animation set editor. Too many flexes at once make debugging painful.
Configuring Bodygroups and Alternate Skins
Bodygroups let one model hold swappable parts. You can switch a hat, a jacket, or a weapon without making a new model. In the QC, each $bodygroup block lists the options, including a blank one. Alternate skins use $texturegroup to swap materials. A single compiled model can then offer many looks. This saves disk space and keeps your SFM animation models easy to manage.
Setting Up Physics and Collision Models
The collision model is a simplified shape used for physics. Export it as a separate SMD with very few faces. For characters, you also add ragdoll joint rules in the QC. These rules decide how limbs bend and fall. Props use $mass and $surfaceprop for realistic weight. Keep collision parts convex and simple. A clean physics file makes ragdolls and props feel natural.
Optimizing Models for Better Performance
Performance matters when scenes get busy. Use fewer materials per model, because each one adds draw cost. Keep triangle counts reasonable. Add Level of Detail models with $lod so far-away models use less detail. Shrink textures that don’t need 4K. For optimizing 3D models for SFM, test your scene with several copies of the model. If playback stays smooth, your setup is healthy.
SFM Compile Best Practices for Reliable Results
Good habits beat clever tricks. A tidy project saves more time than any shortcut. Most pros follow the same few rules. They organize files, change one thing at a time, and test early. These habits keep your SFM model setup stable from the first prop to the hundredth character.
Here is a simple pro routine. Compile small. Test right away. Back up before big edits. Name files in lowercase with no spaces. Keep a text note of every QC change. The table below turns these ideas into a quick plan.
| Habit | Why It Helps |
| Compile after each small change | You find the bad edit fast |
| Keep backups | You can roll back safely |
| Use lowercase names | You avoid path mismatches |
| Test in HLMV first | You catch problems before SFM |
| Study decompiled QC files | You learn proven structures |
Organizing Source Files and Output Directories
Create one main folder for each project. Inside it, make separate folders for source meshes, textures, QC files, and exported output. Mirror the game’s model directory layout when you can. This keeps $modelname and $cdmaterials paths simple. Here is a clean example.
my_project/
source/ (SMD and DMX files)
textures/ (PNG, TGA, VTF)
qc/ (QC files)
output/ (compiled MDL files)
Checking QC Commands and Material Paths
Before every compile, read your QC from top to bottom. Check that each file name matches a real file. Check that $cdmaterials ends with a slash. Confirm that each material in your mesh has a VMT file. Make sure every $sequence line points to the right file. This two-minute review catches a surprising number of SFM compile errors before they ever happen.
Testing Models Before Using Them in Animations
Never wait until a big project to test a model. Open it in HLMV right after compiling. Check textures, bones, and scale there. Then place it in a blank SFM session and pose it. Try a few lights and a quick camera move. If the model passes both tests, you can trust it in a real shot. Early tests protect your hours of animation work.
See Also : Mashable Connections Hints Today: Tricky Clues, Categories & Answers (2026)
Understanding Why a Successful Compile Can Still Produce a Broken Model
“Compile complete” only means the syntax was valid. It doesn’t mean the model is good. The compiler doesn’t judge weight quality or art direction. It won’t warn you when a texture path points to nowhere. It also won’t know your scale is wrong. That’s why testing matters so much. Think of the compiler as a spell-checker. It finds typos but can’t tell whether your story makes sense.
Quick tip: A green “success” message is a starting point, not a finish line. Always open the model and look at it.
Case study (example scenario): A new artist compiles a sword prop. The log says “success,” but the sword shows a checkerboard. The artist checks materials and finds the QC points to models/sword/ while the VMT sits in models/weapons/sword/. After moving the VMT and recompiling, the texture appears. The whole fix took one minute because the artist knew where to look.
Can You Compile Models from Other Games for SFM?
Yes, but the effort depends on the source. Models from other Source engine games are the easiest to reuse. Models from different engines need much more work. You often have to export them to a neutral format and rebuild the rig. In every case, you should respect the creator’s rights. Good model compatibility starts with knowing where the asset came from.
The model’s origin decides your workload. A Source 1 model may need only a decompile and a QC fix. A Source 2 model needs a full rebuild through a 3D tool. A model from a non-Valve engine needs new bones, new materials, and often a new rig. Planning this ahead saves frustration. It also helps you decide when a model is worth the trouble.
Using Models from Compatible Source Engine Games
Many Source 1 games share the same format. You can decompile their models with Crowbar. That gives you SMD or DMX files plus a QC file. Then you edit the QC, fix material paths, and recompile for SFM. This is the standard method for reusing Source engine assets. Copy the textures too, since models need them. Always check the license first. Not every asset is free to reuse.
Source 1 vs. Source 2 Model Compatibility
Source Filmmaker is a Source 1 tool. Source 2 games use newer model formats that SFM can’t load directly. Source 1 and Source 2 model compatibility is therefore limited. The usual workaround is a re-export. Use a community tool to extract the mesh into a neutral format. Open it in Blender and rebuild the skeleton to fit Source 1. Then export to SMD or DMX and compile as normal. This takes real effort, so start with a simple model.
Legal and Copyright Considerations for Custom Models
Models are creative works, so they carry rights. Many creators share their work with rules like “no commercial use” or “credit required.” Read the license notes before you reuse anything. Give credit when it’s asked for. Don’t sell or upload ripped content you don’t own. Community sites also have their own rules. This is general information, not legal advice. When in doubt, ask the creator or make your own model.
Frequently Asked Questions
Do You Need Coding Experience to Compile SFM Models?
No, you don’t. QC files use short, readable commands instead of real programming. Tools like Crowbar handle the hard parts for you. If you can edit a text file and follow steps, you can learn how to compile SFM quickly. Start with a simple prop and copy a working QC as your guide. Skills grow fast after your first success.
How Long Does SFM Model Compilation Take?
Simple props compile in a few seconds. Characters with many animations and flexes may take a minute or more. Your computer speed also matters. Large meshes and long animation files add time. If a compile feels stuck for many minutes, check the log. A crash or bad file may be the cause.
Where Does Source Filmmaker Store Compiled Model Files?
Compiled models usually live in the game\usermod\models folder of your SFM install. Their materials sit in the game\usermod\materials. The exact subfolder comes from your $modelname and $cdmaterials lines. Keep the structure the same across both folders. This makes SFM model installation simple and predictable.
Can You Compile a Model Without a Skeleton?
Yes, you can. Static props need only a mesh, a material, and a simple idle sequence. The compiler adds a basic root bone for you. Characters and moving objects do need a proper model skeleton. For a crate or a table, you can skip bone rigging completely.
Can You Compile Models Without Crowbar?
Yes. Crowbar is optional. You can run studiomdl.exe straight from the command line with your QC file. Crowbar just adds a friendly window and handy extras. Many beginners start with it and move on later. Both routes use the same compiler engine underneath.
Can Blender Files Be Imported Directly into SFM?
No, they can’t. SFM doesn’t read .blend files. You must export to SMD or DMX, then compile the model. Think of a SFM model converter as a chain of steps. Blender exports, the QC describes, and the compiler builds. Only the compiled files will load in Source Filmmaker.
Why Does My Compiled Model Have No Textures?
Almost always, the material path is wrong. Check $cdmaterials in your QC. Then check the VMT name and the $basetexture line. Finally, confirm that the VTF file sits in the correct folder. Fix any mismatch and recompile. Most missing-texture cases end there.
Does Every SFM Model Need a PHY File?
No. Many models load fine without one. The PHY file stores the collision model. You need it for physics props and ragdolls. A simple decorative prop can skip it. Still, adding a basic collision shape is a good habit for objects that should interact with the world.
Can You Recompile an Existing Source Model?
Yes, with limits. Use Crowbar to decompile the model into SMD or DMX files and a QC. Edit what you need and compile again. Some data can be lost or look different after decompiling. Also check the creator’s permission before you share a changed version.
Can SFM Compile Models for Source 2 Games?
No. SFM works with Source 1 only. Source 2 games use different tools and formats. If you want a Source 2 model in SFM, you must export it to a neutral format and rebuild it for Source 1. Check model compatibility first, because the work can be large.
Conclusion
Here’s the short version of the SFM compilation process. You build a clean model and export it as SMD or DMX. You convert textures to VTF and VMT. You write a small QC file and compile it with Crowbar or StudioMDL. Then you install the files and test them in HLMV and SFM. This SFM compile 2026 workflow works for props, weapons, and characters alike.
Now it’s your turn. Pick one simple prop today and walk it through every step. Expect a few errors, and treat them as lessons. Each fix makes you faster and more confident. When you succeed, try a rigged character next. If you hit a snag, share it in the comments. Your first compiled model is closer than you think.