

SFM Compile Made Easy: The Complete Guide to Source Filmmaker (2026)
You drop a custom model into Source Filmmaker. You hit play. Instead of your character, you see a purple and black checkerboard. Sound familiar? Nearly every new creator hits this wall. The fix has a name: SFM compile.
This SFM compile tutorial takes you from a raw Blender file to a working model. It works as a SFM beginner guide and a SFM compile guide 2026 in one. Every step uses plain words. By the end, you will know how to compile models for Source Filmmaker with confidence.
What Is SFM Compile and How Does It Work?
SFM compiler turns raw 3D data into files the Source engine can read. Think of it like translating a novel. The story stays the same. Every sentence gets rewritten for a new reader. Your mesh, bones, and textures are the story. The Source engine model compiler is the translator.
The tool that does the work is StudioMDL. It reads a text recipe called a QC file and builds the final model. Most beginners run it through Crowbar. The result is a set of SFM model files that load like any built-in asset. This is the heart of Source Filmmaker model compilation.
What Model Compilation Actually Does
Model compilation reads your mesh export, your skeleton, and your material names. It then splits the mesh into triangles and works out smooth shading for every vertex. Next, it stores the bone weights so the mesh bends with the skeleton. It also links each surface to a material name. Finally, it writes the MDL model file and its helper files in a form the graphics card can draw fast. You can think of it as packing a suitcase. Everything fits tightly and nothing needs unpacking at run time.
Source Files vs. Compiled Model Files
Source files are what you make and edit. Compiled files are what the engine loads. You keep the first group for future fixes. You ship the second group to SFM. Mixing them up is a classic beginner mistake. The table below shows the split.
| Group | File | Role |
| Source | SMD file format or DMX file format | Holds mesh, bones, and animation data |
| Source | QC file | Tells the compiler what to build |
| Source | PNG or TGA image | Raw texture before conversion |
| Compiled | MDL model file | Main model header and bone data |
| Compiled | VVD vertex data | Stores vertex positions and weights |
| Compiled | VTX optimized mesh data | Stores draw order for the GPU |
| Compiled | PHY physics file | Stores the collision shape |
Why Source Filmmaker Requires Model Compilation
SFM cannot open .blend, .fbx, or .max files. Those formats carry modifiers, custom rigs, and extra data the engine never expected. Valve built the Source engine to load fast. So it reads only its own tight binary format. Compiling bridges that gap. It also lets Valve keep one stable model standard across many games. Every one of your SFM custom models must pass through this gate before it can appear in the viewport.
Essential Files Used in SFM Compilation
A single model needs several files that work as a team. Some describe shape. Some describe color. Others describe how the compiler should treat them. If one is missing or misnamed, the whole chain breaks. Knowing each file’s job makes every later step easier.
Here is the pipeline in one glance. Read it left to right.
Blender → SMD/DMX + QC + VMT/VTF → StudioMDL → MDL + VVD + VTX + PHY → SFM
SMD vs. DMX: Which Format Should You Use?
The SMD file format is plain text. It is simple and works almost everywhere. The DMX file format is newer and is the native format of SFM. It stores facial flexes inside the same file and holds data at higher precision. For the SMD vs DMX for model compilation question, use SMD for static props and simple rigs. Switch to DMX when you need rich face animation. Blender 3D software can export both through the Source Tools add-on.
| Feature | SMD | DMX |
| File type | Plain text | Binary or text |
| Flex support | Needs a separate VTA file | Built into the file |
| Beginner friendly | Very | Moderate |
| Best for | Props and simple characters | Expressive characters |
Understanding MDL, VTX, VVD, and PHY Files
Each compiled file has one job. The MDL model file holds the skeleton, animation sequences, and links to the rest. The VVD vertex data holds the points that make up your mesh. The VTX optimized mesh data tells the graphics card how to draw those points quickly. The PHY physics file holds a simple collision shape. All four must sit side by side in the same model directory. Move one without the others and SFM will refuse to load the model.
How QC Files Control Model Compilation
The QC file is a short text script. It works like a recipe card for StudioMDL. Learning to write one is the biggest step in creating a QC file for model compilation. A few commands cover most beginner needs.
| Command | What it does |
| $modelname | Sets the output path and name of the MDL |
| $body | Points to the reference mesh file |
| $cdmaterials | Sets the folder where materials live |
| $sequence | Adds an animation or idle pose |
| $collisionmodel | Adds the physics mesh |
Keep the file short and tidy. Most SFM compile errors start with a typo here.
How VMT and VTF Files Handle Textures
A VTF texture file is the image itself. A VMT material file is the recipe that tells the engine how to use that image. This pair handles all texture mapping in the Source engine. The VMT names the VTF and sets shader options such as shine or transparency. Here is a tiny example.
“VertexLitGeneric”
{
“$basetexture” “models/props/my_crate/crate_diffuse”
}
Notice the path has no file extension. It is also relative to the materials folder. Get this path wrong and you will see the checkerboard.
Best Tools for the SFM Compile Process
You do not need pricey software. A few free tools cover the entire SFM compilation process. Each one handles a different stage. Together they take you from sculpt to screen.
Start small and add tools as you grow. Many creators never leave this core set. The table shows what each tool does and how hard it is to learn.
| Tool | Purpose | Skill level |
| StudioMDL | Builds the final model from the QC file | Moderate |
| Crowbar | Friendly window for compiling and decompiling | Beginner |
| Blender 3D software | Modeling, rigging, and export | Moderate |
| HLMV model viewer | Quick model checks | Beginner |
| VTFEdit | Converts images to VTF | Beginner |
| Notepad++ | Edits QC and VMT text files | Beginner |
StudioMDL: The Source Model Compiler
StudioMDL is Valve’s own command-line compiler. It ships inside the SFM install, usually in the game’s bin folder. The StudioMDL compiler reads your QC file line by line. Then it writes every output file. You run it with a game flag that points to your content folder. A typical call looks like studiomdl.exe -game “path\to\game\usermod” model.qc. The command line feels harsh at first. However, it gives you the most control once you know the flags.
Crowbar: A Beginner-Friendly Compilation Tool
Crowbar wraps StudioMDL in a simple window. This Crowbar compiler tutorial can be short because the tool is so clear. You open the Set Up Games tab and pick Source Filmmaker. Then you open the Compile tab and choose your QC file. One click starts the job. Crowbar also decompiles models, which helps you study working examples. You can download it for free from its GitHub page. Learning how to use Crowbar for SFM is the fastest way to your first success.
Blender: Preparing and Exporting 3D Models
Blender 3D software is free and powerful. With the Blender Source Tools add-on, it exports SMD and DMX files directly. This is the usual route for exporting Blender models to SFM. Install the add-on and check which Blender versions it supports. Then build your mesh, rig it, and export. Blender handles the art side. The compiler handles the engine side. Keeping those jobs separate keeps your mind clear.
HLMV: Testing Compiled Models
HLMV is the Half-Life Model Viewer. The HLMV model viewer opens a compiled model in seconds. You can spin it, view textures, and play animation sequences. It also shows bodygroups and bone layouts. Crowbar can launch it for you from its View tab. Testing compiled models in HLMV saves time because it is faster than loading SFM. If a model looks wrong here, it will look wrong in your film.
What You Need Before Compiling an SFM Model

Good prep prevents most trouble. A messy model gives messy results. Spend ten minutes on checks and you will save hours of fixing.
Use the table below as a pre-flight list. Tick each box before you export. This habit is the base of solid SFM model setup.
| Check | Done |
| Scale, rotation, and location applied | ☐ |
| One armature with clear bone names | ☐ |
| Weights normalized and limited | ☐ |
| Textures sized in powers of two | ☐ |
| Reference pose saved | ☐ |
| SFM usermod folder located | ☐ |
Model, Skeleton, and Mesh Requirements
These are the Source Filmmaker model file requirements that matter most. Apply all transforms so the mesh has a clean scale. Keep topology tidy and remove loose points. Source limits how many bone influences a vertex can have. Three is the usual cap. It also caps how many vertices fit in one mesh. A commonly cited figure is 65,536. Check the Valve Developer Community for current numbers. Good skeleton rigging uses sensible bone names and a single root bone.
Preparing Textures, Materials, and Animations
Size every texture in powers of two. Common sizes are 512, 1024, and 2048 pixels. Give each material a clear name that matches your folder plan. Save a reference pose for the mesh. Then add an idle pose even for a static prop. Compilers need at least one sequence. This is also when you plan SFM texture conversion with VTFEdit. A prop needs only one texture. A character may need several. Good SFM animation models begin with a clean bind pose.
Setting Up the Correct SFM Game Directory
SFM looks for custom content in a folder called usermod. You will find it inside the game folder of your SFM install. Place compiled models in the models folder there. Place materials in the materials folder. The subfolder names must match your QC and VMT paths. A tidy model directory makes SFM model installation painless. A messy one causes ghost problems that are hard to trace.
See Also : Mashable Connections Hints Today: Tricky Clues, Categories & Answers (2026)
How to Compile an SFM Model Step by Step
This is the core of the step-by-step SFM compilation process. Each step builds on the last. Do not skip ahead. Most failures come from rushing.
Here is the roadmap. Read it once and then follow the details below.
| Step | Task | Main tool |
| 1 | Prepare and validate the model | Blender |
| 2 | Check skeleton, bones, and weights | Blender |
| 3 | Export as SMD or DMX | Source Tools |
| 4 | Prepare textures and materials | VTFEdit |
| 5 | Create the QC file | Notepad++ |
| 6 | Set up StudioMDL or Crowbar | Crowbar |
| 7 | Run the compiler and read the log | Crowbar |
| 8 | Install files in SFM | File explorer |
| 9 | Test in HLMV and SFM | HLMV and SFM |
Step 1: Prepare and Validate Your 3D Model
Start with a finished model. Apply every modifier you plan to keep. Then apply scale, rotation, and location. Delete loose vertices and hidden junk. Check your UV maps so texture mapping will land where you expect. Scale also matters. In Source, a human stands about 70 to 75 units tall. Compare your model to a Team Fortress 2 character if you can. This is the first stage of preparing 3D models for the Source engine.
Step 2: Check the Skeleton, Bones, and Weights
Make sure the model has one armature. Parent the mesh to it. Then paint or check your bone weights. Normalize them so each vertex adds up to one. Limit each vertex to three influences. Rename bones in a clear way. If you want to reuse Source animations, match the Source bone names. Bad weights cause stretched limbs later. This step is key for fixing broken model skeletons before they ever appear.
Step 3: Export the Model as SMD or DMX
Open the Source Tools panel in Blender. Pick your export folder and your format. Export the reference mesh first. Name it clearly, such as crate_ref.smd. Export the collision mesh as a second file if you need physics. This stage is your main mesh export. For each animation, export a separate file. Keep every file in one project folder next to your future QC file.
Step 4: Prepare Textures and Material Files
Open your PNG or TGA in VTFEdit. Import the image and check that its size uses powers of two. Choose DXT1 for plain color and DXT5 when you need alpha. Turn on mipmaps. Save the VTF texture file in your materials folder. Then write the matching VMT material file. This is the full converting textures for Source Filmmaker routine. Double check the path inside the VMT. One wrong slash breaks the link.
Step 5: Create and Configure the QC File
Open Notepad++ and write your QC. Here is a small sample for a static prop.
$modelname “props/my_crate.mdl”
$body “crate” “crate_ref.smd”
$cdmaterials “models/props/my_crate/”
$staticprop
$surfaceprop “wood”
$sequence “idle” “crate_ref.smd” fps 30
$collisionmodel “crate_phys.smd” { $mass 40 }
Each line has a job. The name line sets the output. The body line loads the mesh. The materials line points to your textures and ends with a slash. The sequence line gives the model its required idle pose. Start with a prop like this one. Compiling static props comes before compiling character models.
Step 6: Set Up StudioMDL or Crowbar
Open Crowbar and go to Set Up Games. Choose Source Filmmaker from the list. Check that the paths for StudioMDL and the game info file look right. Next, open the Compile tab and select your QC file. Pick an output option that sends files to the game’s model folder. If you prefer raw control, run StudioMDL from a command prompt. Both routes use the same engine. This is the heart of any Crowbar compiler tutorial.
Step 7: Run the Compiler and Review the Log
Click Compile and watch the log. Read it from top to bottom. The first error is the one that matters most. Later errors often come from the first one. Look for words like error and warning. Then look for a final line that says the compile finished. The compiler error logs will name missing files and bad paths. This is your best tool for debugging SFM compilation issues.
Step 8: Install the Compiled Files in SFM
Check the output folder. You should see the MDL, VVD, VTX, and PHY files together. Place them inside usermod under the models folder. Put your VMT and VTF files under the materials folder. Folder names must match your QC and VMT paths. This is the final act of installing custom models in Source Filmmaker. Restart SFM afterward. The model browser then refreshes and shows your new asset.
Step 9: Test the Model in HLMV and Source Filmmaker
Open the model in HLMV first. Check the textures. Play the idle sequence. Switch bodygroups if you have any. Then open SFM and add the model to a scene. Right click in the animation set editor and create an animation set for the new model. Move a few bones. Light it. Render a quick frame. If everything works, you have finished your first SFM compile tutorial project.
Common SFM Compile Errors and How to Fix Them
Almost everyone’s first compile fails. That is normal. Even veterans hit errors every week. The trick is knowing where to look.
Most SFM compile errors fall into a few groups. The table gives a fast lookup. After that, each case gets a closer look.
| Error | Likely cause | Fix |
| Cannot find QC or SMD | Wrong path or typo | Fix file names and folders |
| Checkerboard texture | Bad VMT or VTF path | Match $cdmaterials and $basetexture |
| Model not in SFM | Wrong install folder | Move files into usermod |
| Missing parts | Mesh not in $body | Add or fix body lines |
| Stretched mesh | Poor weights | Re-weight and normalize |
| T-pose only | No animations | Add $sequence lines |
| Wrong size | Scale not applied | Use $scale or fix in Blender |
| Crash | Bad or huge mesh | Simplify and recompile |
StudioMDL Cannot Find the QC or SMD File
This error means the compiler cannot reach a file. Check spelling first. Then check the folder. Place the SMD files next to the QC or use a $cd line to point at their folder. Avoid odd symbols in folder names. Spaces can also cause trouble in command line use. When troubleshooting StudioMDL compiler errors, always begin with paths. They solve more problems than any other fix.
Purple and Black Checkerboard Textures
The checkerboard means the engine cannot find a material. Open your QC and read the $cdmaterials line. Then open your VMT and read the $basetexture line. Both must point to real folders. Do not add file extensions in the VMT. Confirm the VTF file sits where the VMT says. This is the main recipe for fixing missing SFM textures. Nine times out of ten, a small path typo is the cause.
Model Compiles but Does Not Appear in SFM
A clean compile does not guarantee a visible model. The files may sit in the wrong place. Move them into the usermod models folder. Make sure the $modelname path matches your folder plan. Restart SFM so it rebuilds its model list. Also confirm all four compiled files stayed together. Missing helper files can hide a model from the browser. A quick check in HLMV can prove the model itself is fine.
Missing Meshes, Materials, or Model Parts
If parts vanish, the compiler never saw them. Check that every mesh object is in the exported file. Make sure each piece has a material and a bone weight. Look at your $body and $bodygroup lines. A missing line leaves out a whole part. Unweighted vertices can also drop out. Review the log for warnings about skipped faces. Fixing this usually means re-exporting rather than editing the QC.
Broken Bones, Weight Painting, and Deformation Issues
Stretched limbs point to weight problems. Open Blender and look at each bone’s influence. Normalize the weights. Limit each vertex to three bones. Check that the armature scale is applied. Then pose the rig and test extreme bends. Small fixes here pay off in smooth animation. This is the practical side of fixing broken model skeletons. Always test with a simple bend before you export again.
See Also : Money BetterThisWorld: 15 Smart Strategies for Purposeful Wealth in 2026
Model Appears in a T-Pose or Animations Do Not Work
A T-pose is normal for a model with no motion data. It means only the reference pose exists. To add motion, export animation sequences and add $sequence lines for each. If you want to reuse Source animations, bone names must match the Source skeleton. Otherwise the animations cannot find their targets. This is the key to compiling animated characters for SFM. A well-named rig saves you from rebuilding motion by hand.
Incorrect Model Scale or Orientation
A tiny or giant model usually has unapplied scale. Fix it in Blender first. If the model faces the wrong way, check the axis settings in your exporter. You can also use $scale in the QC to adjust size. Compare your model to a known Source character. Sizing early keeps later steps simple. Small scale errors multiply across rigs and animations. Fix them at the source and you will never see them again.
Compiler Crashes or Reports Errors
Crashes often come from huge meshes or damaged files. Try compiling a simpler version first. Split big meshes into parts. Re-export the SMD files from a clean scene. Run the compiler from the command line so you can read the full message. Save every log. Patterns appear over time. The aim of debugging SFM compilation issues is to find the smallest change that breaks or fixes the build.
How to Test and Troubleshoot a Compiled SFM Model
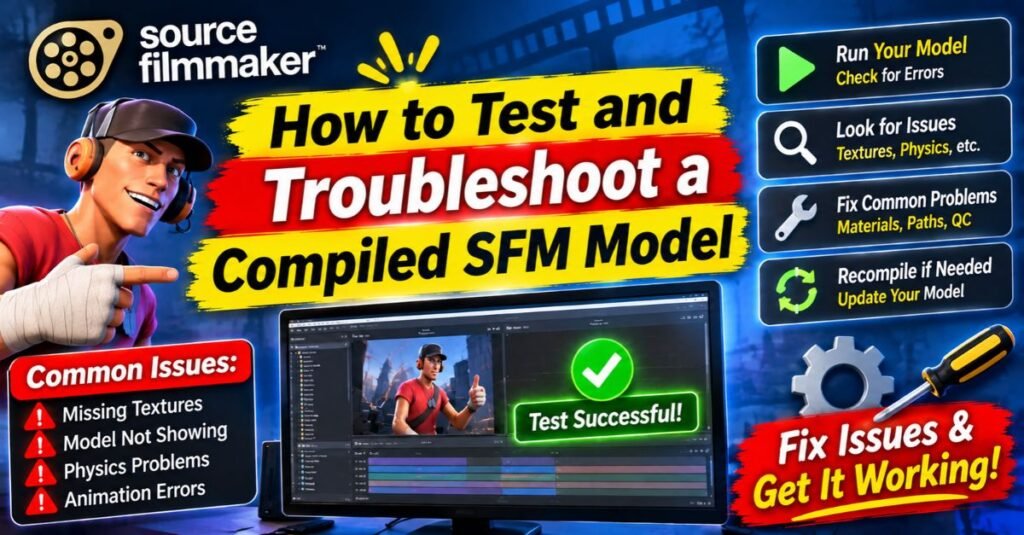
A compile only proves the files exist. It does not prove the model looks right. So treat testing as its own stage. Build a short routine and repeat it every time.
A good routine has four moves. Read the log. Check the paths. Open the model in HLMV. Then test it in SFM. Use this loop after every change and you will find problems fast.
Reading StudioMDL and Crowbar Error Logs
Read the log from the top. The first error is the root cause. Later messages are often side effects. Look for missing file names and material warnings. Copy the exact message into a search to find community answers. Crowbar shows the same text as StudioMDL in a friendlier window. Practicing with compiler error logs is the fastest way to grow your skills. You will soon spot patterns at a glance.
Checking Model Paths and Material Directories
Many bugs hide in paths. Compare three places. The $modelname line sets where the MDL goes. The $cdmaterials line sets where the engine searches for materials. The VMT sets which VTF to load. All three must agree with your real folders. This is the core of checking model paths and material directories. Draw a small folder map on paper if it helps. It keeps your naming habits steady across projects.
Using HLMV to Inspect Models Before Importing
Open the model in the HLMV model viewer before you go near SFM. Spin it and check the textures. Play each sequence. Toggle bodygroups and skins. Turn on the bone display to see the skeleton. The viewer loads in seconds. That makes it perfect for rapid checks. It helps you separate model problems from scene problems. If HLMV looks right and SFM looks wrong, the issue sits in your scene.
Why a Successful Compiler Can Still Produce a Broken Model
The compiler checks syntax and data. It does not judge art. A model can build with bad weights, flipped faces, or wrong scales. It can also build with a texture path that points nowhere. The compiler may only warn about these. It will not stop. Here is a handy rule from the community: a green compile is the start of testing, not the end. Always look at your work with your own eyes.
Advanced SFM Compilation Techniques
Once your first prop works, you can level up. These skills turn simple assets into polished ones. Add them one at a time.
Each technique builds on the basics. Skipping the basics makes them harder. Take your time and keep your first working files as a safe backup.
Compiling Custom Characters and Animated Models
Characters add skeletons, many meshes, and many animations. List each pose or motion with its own sequence line. You can also reuse Valve motion with an include line when your bone names match the Source rig. This is how most creators handle compiling custom models in SFM. Test one animation at a time. Add more when the first works. This approach keeps SFM animation models easy to debug.
Setting Up Facial Flexes and Expressions
Facial flexes let a face smile, blink, and talk. In Blender you build shape keys. With the DMX file format, those keys travel inside the file. Then the QC sets up controllers and rules to drive them. This is detailed work. Start with a few simple shapes such as blink and mouth open. Test each one in SFM’s flex sliders. Add more once the first group behaves.
See Also : Mastering Your Health: A Simple Guide to Smarter Daily Habits in 2026
Using Bodygroups and Multiple Skins
Bodygroups let one model hold swappable parts. Think hats, glasses, or outfits. You declare each group in the QC with its own mesh options. Skins work a little differently. They swap whole texture sets on the same mesh. One model can then show many colors. These tools keep your Source Filmmaker assets tidy. You ship one model instead of ten.
Configuring Physics and Collision Models
Collision models use a simple shape that sits inside the visible mesh. Build it from boxes or low-detail hulls. Export it as its own file. Then add a $collisionmodel line in the QC. The compiler builds the PHY physics file from it. Static props can skip physics. Ragdolls and movable props need it. Keep the shape light. A simple hull behaves better than a copy of the full mesh.
Optimizing Models for Better SFM Performance
Good SFM model optimization keeps your scenes smooth. Trim hidden faces that no camera will see. Use fewer materials where you can. Pick sensible texture sizes. Add level-of-detail meshes so distant models use fewer triangles. This approach covers optimizing custom models for SFM performance. Community creators often keep characters in the tens of thousands of triangles. Test with several models in one scene to see the real cost.
SFM Compile Best Practices for Beginners

Great habits beat raw talent. A few simple rules will carry you through your first year. They also stop most frustration before it starts.
Stay patient. Your first few compiles will fail. That is part of the path. Here is a piece of advice the community repeats: compile the prop first and the character later.
Organizing Source Files and Project Folders
Give each project its own folder. Inside it, keep subfolders for mesh files, textures, and QC scripts. Mirror the final usermod layout when you can. Then paths in your QC match real folders. Add a short text note listing your tool versions. A calm folder structure is a quiet superpower. You can return after months and know exactly where everything sits.
Maintaining Correct File Paths and Naming Conventions
Use lowercase names. Avoid spaces and odd symbols. Stick to letters, numbers, and underscores. Keep the same name across the SMD, QC, VMT, and VTF files for one asset. This simple habit cuts path errors sharply. It also makes your SFM model setup easy to share with others. Consistent names help teammates and your future self.
Creating Backups Before Recompiling Models
Back up your source files before every big change. Copy the project folder and add a date to its name. Cloud storage works well for this. A backup lets you undo a bad export in seconds. Here is a short case study. A beginner spent a weekend rigging a character. One wrong export overwrote the only good file. A single backup would have saved two days.
Final SFM Compilation Checklist
Run this list every time you compile. It catches the common slips.
| Item | Done |
| Transforms applied | ☐ |
| Bones named and weights normalized | ☐ |
| SMD or DMX exported to the project folder | ☐ |
| VTF and VMT paths match $cdmaterials | ☐ |
| QC file checked for typos | ☐ |
| Log read from top to bottom | ☐ |
| Files copied to usermod | ☐ |
| Model tested in HLMV and SFM | ☐ |
| Backup saved | ☐ |
Frequently Asked Questions
Do You Need Coding Experience to Compile SFM Models?
No. A QC file uses short, readable commands rather than real programming. You copy a working example and change names and paths. Crowbar handles the technical work. If you can edit a text file, you can learn SFM compile basics in a weekend.
Can You Compile an SFM Model Without Crowbar?
Yes. Crowbar only wraps StudioMDL in a window. You can run StudioMDL straight from the command line with a QC file and a game path. Many creators write a small batch file to repeat the command. Crowbar is simply the easier route.
Can You Use Blender Files Directly in Source Filmmaker?
No. SFM cannot read .blend files. You must export an SMD or DMX file first. Then you compile it with a QC file. The result is an MDL model set. This extra step is what the whole SFM compilation process is about.
Where Are Compiled SFM Model Files Saved?
They go to the output folder you pick. Many users send them to the usermod models folder inside the SFM game directory. Materials live in a separate materials folder. Always keep the MDL, VVD, VTX, and PHY files together in one place.
Should You Use SMD or DMX for SFM Models?
Use SMD for props and simple rigs. It is easy and widely supported. Use DMX when you need facial flexes or higher precision. SFM reads DMX natively. Many creators start with SMD and move to DMX as their projects grow.
Do All Compiled Models Need a PHY File?
No. Static props and many characters work without one. A PHY file matters when an object needs collision or physics. Ragdolls and movable props benefit most. If you skip it, remove the collision line from your QC.
Can You Use Models From Other Games in SFM?
Sometimes. Models from other Source games often work after small fixes. Models from other engines need conversion and a full recompile. Always check the license and the asset’s terms first. Many game assets are protected by copyright.
Can Source 2 Models Work in the Original SFM?
No. Source 2 uses different model formats. The original SFM runs on the older Source engine. You would need the original mesh data. Then you would rebuild and recompile it with the Source workflow described in this guide.
How Long Does SFM Model Compilation Take?
Simple props compile in seconds. Characters with many animations, flexes, and LODs can take a few minutes. Speed also depends on your computer. Large meshes slow things down. Test small changes often to keep each compile quick.
Why Does My Compiled Model Have Missing Textures?
The paths are almost always wrong. Compare $cdmaterials in the QC with $basetexture in the VMT. Confirm the VTF file exists in that folder. Remove file extensions from the VMT path. Then recompile and restart SFM.
Conclusion
You now have the full picture. SFM compile turns your Blender work into Source engine assets that SFM can use. You learned the files, the tools, and the nine steps. You also learned how to read logs and fix common errors. None of it is magic. It is a repeatable routine.
Here is your next move. Pick one simple static prop today. Export it, write a short QC file, and compile it with Crowbar. Fix whatever breaks. Then try a character. Every success makes the next one easier. Start small and keep going. Your first working model is closer than you think.






One Comment